Copic Ink; Refill + Paint
15-09-2023
Copic Ink Series: How to utilize all the features of Copic Ink
Today’s Feature:
How to Use Copic Ink as a Marker Refill

Greetings Copic readers! In our previous blog, we showed you how to color a house with Copic markers. But what if you’re in the middle of coloring something and your marker runs out of ink? In this new 4-part blog series, we’re going to be showing you all the basics of Copic Ink, how to use it to refill your markers AND how you can use it to create alcohol ink art paintings (and various techniques to use in those paintings)! With that being said, let’s get started by first showing off the most common way to use Copic Ink: as a marker refill.

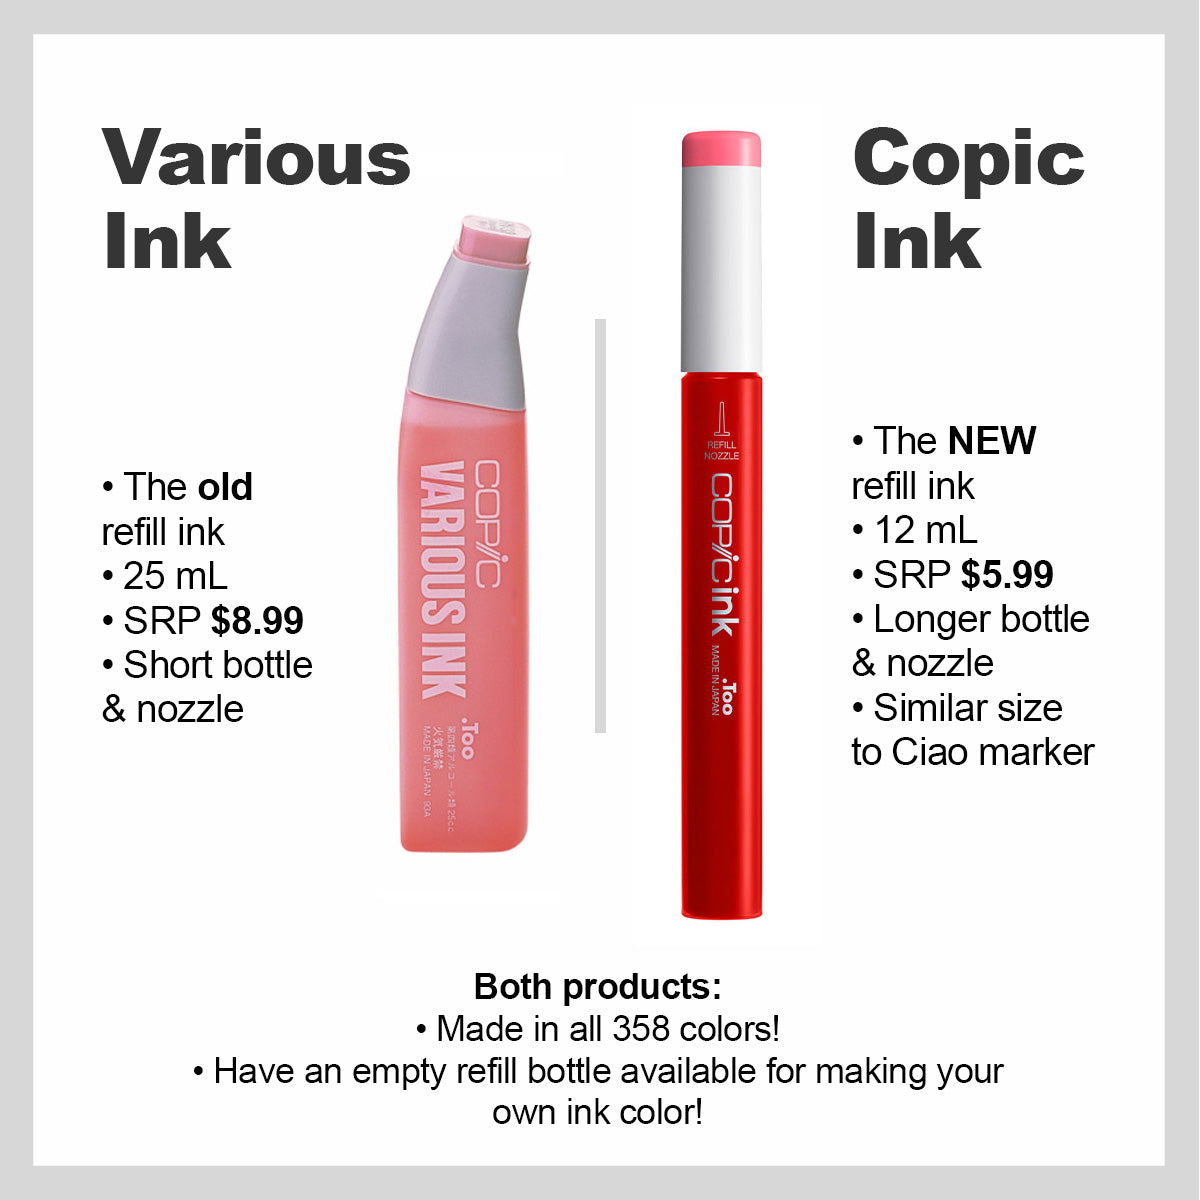
Some of you who have known the Copic brand for a long time know that there are 358 marker colors, and that each marker type (Sketch, Ciao, Classic, and Wide) can be refilled. The old refill product was Copic Various Ink, and as you can see on the left side of the graphic above, it was a shorter, bulkier product containing 25 mL of ink. A few years ago, Copic Japan decided to redesign this bulky bottle into a more ergonomic shape, making it much easier to both refill your markers and to store them properly alongside your markers in a Copic Wallet (or any other standard marker storage shelves). That product, Copic Ink, is what we’re going to be highlighting today!

PART 1: COPIC INK AS A MARKER REFILL
The first thing we’ll be talking about is how everyone knows the product: as a refill for your markers. There are 358 Copic Ink colors to correspond to every Copic marker color. That’s a lot of colors to choose from! Whenever any of your Copic markers dry out, follow the steps below to refill the marker.

1. Uncap both ends of the marker.
The reason we suggest uncapping both ends of the marker while refilling is to relieve any pressure that might have built up inside the marker. Pressure build-up is what causes the ink to gush out randomly! When you uncap both ends and remove the nib of one of them (the broad side), this allows any air built up to be released, and any kind of ink-gushing problem should be resolved then.

2. Use tweezers to remove the broad end of the marker.
We recommend this nib because it’s stiffer and won’t get damaged as easily from the teeth of the tweezers when gripping the nib to remove it.


3. Upcap the Copic Ink bottle and insert the nozzle into the broad end of the marker.
Use the mL guides on the side of the bottle to properly fill up the marker. Or, follow the approximate refilling guides for each type of marker in the chart above.

4. Re-insert the marker nib, making sure it’s secure.
You should feel the nib snap back into place if done properly.

5. Put the caps back on both ends of the marker and lay it flat on a table so the ink can evenly distribute to both ends. Wait 5-10 minutes while the ink is distributed, then the marker is free to use!

And with those 5 steps, we wrap up today’s blog on how to refill any of the 4 Copic marker types with Copic Ink! Stay tuned for our next blog, where we’ll be showing you part 2 in this series: How to use Copic Ink as a Painting Medium! We’ll see you then!
Read More Articles
Copic Acrea on Canvas
How to use Acrea on various types of Canvas Hello Copic readers! In our previous blog, we wrapped up our discussion on how to use Acrea o...

The Best Papers for COPIC Acrea
How to Layer with Acrea on Various Types of Paper Hello Copic readers! In our previous blog, we wrapped up our discussion on how to use ...

Copic Acrea with Copic Ink
How can Acrea be used with Copic Ink? Greetings Copic readers! In our previous blog, we discussed how Acrea compares with Copic Multil...

Copic Acrea with Multiliners
How does Acrea compare with Copic Multiliner Pens? Greetings Copic readers! In our previous blog, we discussed how Acrea compares to the ...


