


Nature, draw + outline LEAVES
15-09-2022
Nature Series: How to draw and outline…
Today’s Feature: Leaves!

In today’s blog, we’ll be continuing on our nature series with a new subject: how to draw and outline 12 different leaves! This blog will guide you step-by-step, starting with pencil sketches and ending with tips on how to use your Copic Multliliner or Multiliner SP pens to outline. With that being said, let’s get started with our pencil and a few sheets of cardstock or marker paper!

The first step in drawing these leaves is to find good reference images for each one. You can use Google Images, Pinterest, or even take pictures yourself to refer to as you sketch! Once you’ve gathered those images, begin by loosely sketching each leaf shape, being sure not to press your pencil down to the paper too hard (since these lines will need to be erased later on).
Notice how each leaf has a vertical line drawn, separating the left and right sides. Drawing a vertical line is a simple way to map out each side of the leaf and functions as a great guide when you’re sketching!

The next step is to define each leaf shape by adding curves and softer edges. The reason we recommend sketching lightly at the beginning/when you’re mapping out each leaf shape is so that you can go over the “skeleton” of each shape with more refined lines. Feel free to press a little bit harder to the page as you want to make sure these defined lines stand out more for when you add ink later!

The last step using your pencil is to add details! This means drawing in the veins of each leaf. Be sure to curve the veins in a way that bends to the shape of each one. For example, the elm and chestnut leaves will have straight lines for the veins. The ginkgo, maple, and oak leaves will have curved lines. It just depends on the nature of each leaf! And this is where your reference images will come in handy :)

The next step is to add ink! Using a Copic Multiliner (or Multliner SP) pen, outline each leaf in a single pass. This means that you trace over your pencil sketch with the pen only one time, to firmly outline each shape (I used a 0.5 pen for outlining the above). If your outlines aren’t exactly on top of your pencil drawing, that’s completely fine! As long as the general gist of each leaf is captured with the pen, we can move on to the final step!

The last step is to erase the pencil lines underneath (once the ink from step 4 has completely dried) and add line variation. Basically, you want to go over the outline of each leaf one more time so that they’re thicker than the veins inside and stand out more. This level of contrast heightens the appearance of each leaf and makes them ready for coloring, which we’ll show how to do in our next blog!

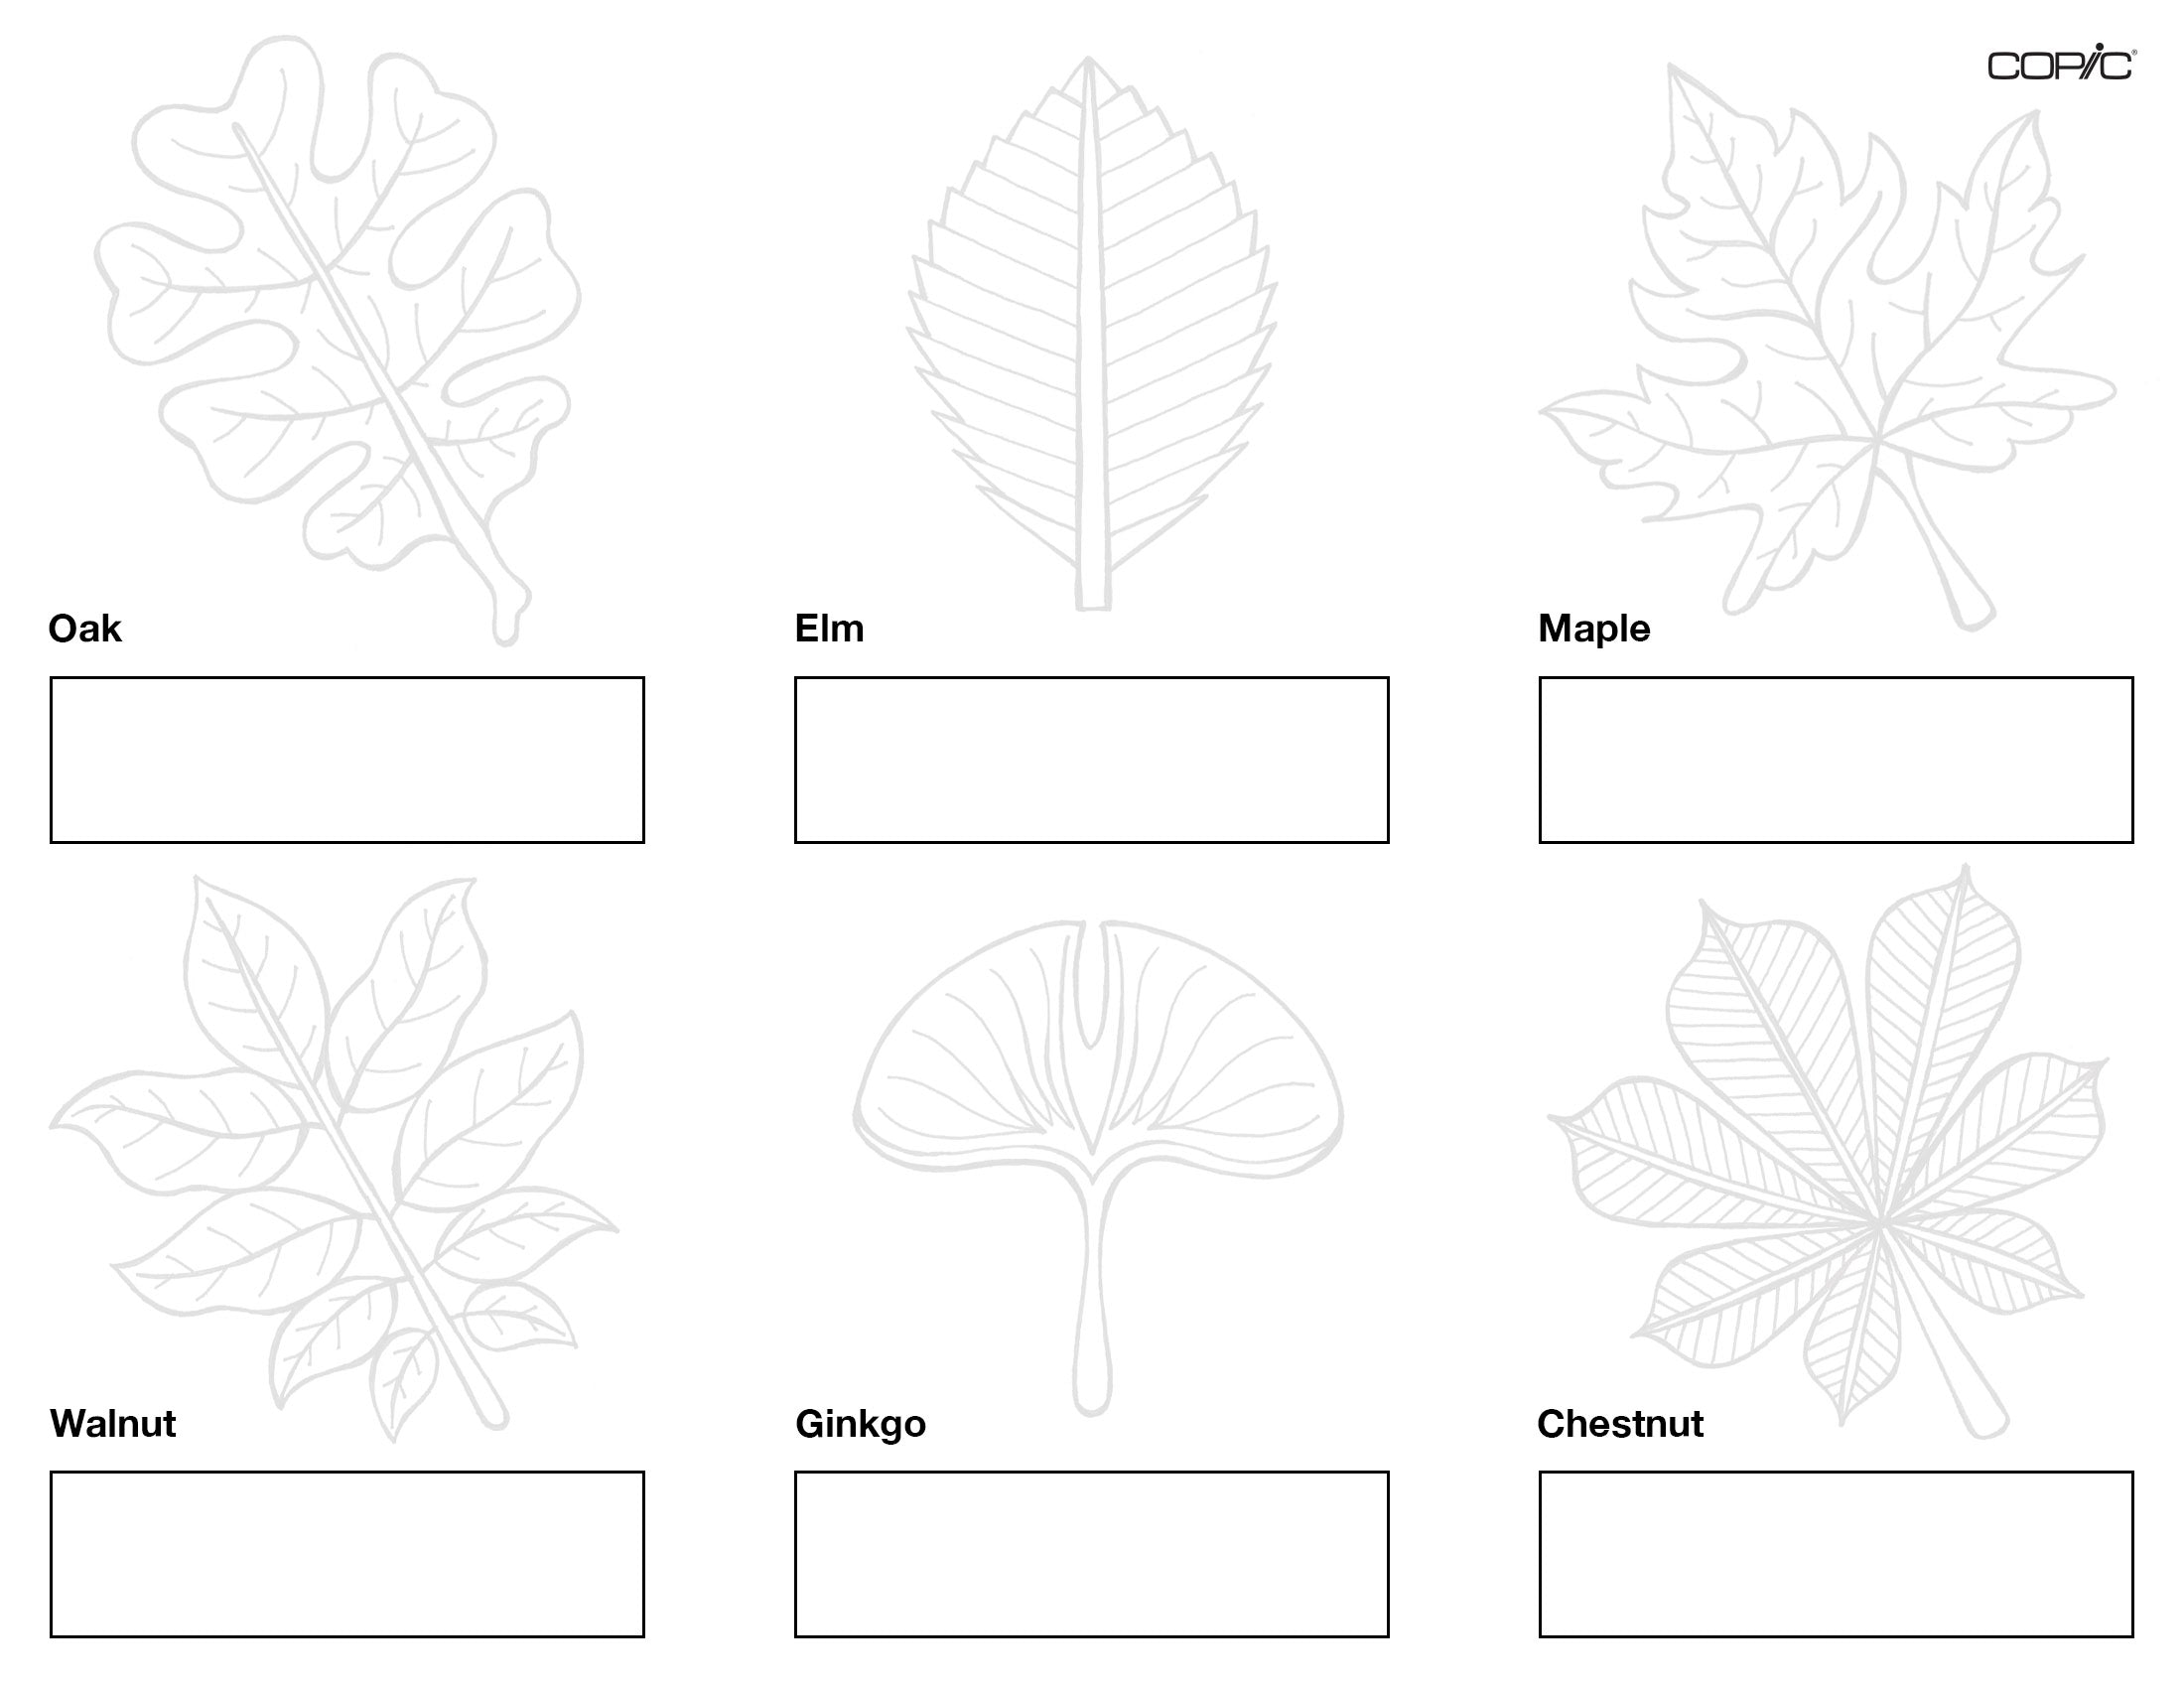


The templates above can be downloaded and printed from our line art gallery on our website. Use the black-outlined leaves to practice your coloring in anticipation of our next blog, or use the gray-outlined leaves to practice your outlining using Copic Multiliner pens!
*We recommend printing these 8.5x11 sheets on cardstock or marker paper; paper suitable for pens and/or markers.
Stay tuned for our next blog, where we’ll be showing how to color 6 of these leaves in detail!
Read More Articles
Copic Acrea on Canvas
How to use Acrea on various types of Canvas Hello Copic readers! In our previous blog, we wrapped up our discussion on how to use Acrea o...
The Best Papers for COPIC Acrea
How to Layer with Acrea on Various Types of Paper Hello Copic readers! In our previous blog, we wrapped up our discussion on how to use ...

Copic Acrea with Copic Ink
How can Acrea be used with Copic Ink? Greetings Copic readers! In our previous blog, we discussed how Acrea compares with Copic Multil...

Copic Acrea with Multiliners
How does Acrea compare with Copic Multiliner Pens? Greetings Copic readers! In our previous blog, we discussed how Acrea compares to the ...


