Browns; how to color LIPS
30-05-2022
Using Earth-Tones to Color Human Features
Today’s Feature: LIPS!

In this blog, we’ll be showing you how to sketch and color lips! There are so many different shapes and expressions lips can make, so we’ll just be going over how to draw some basic lip shapes and then get to the fun part: coloring! Coloring lips is so fun because there are all sorts of lipstick colors! But in this blog, we’ll be using more natural colors in our examples. And with that, let’s get started with some drawing tips for lips!

When you first get started drawing lips, it’s important to think about the proportions first. Do you want the bottom lip to be a lot larger than the top one? Or do you want the top lip to have a pout? How wide do you want the lips to be? These are just a few questions to ask yourself before you start drawing, and that’s why Step 1 above begins with a grid!
After you’ve penciled out your grid, connect the dots with straight lines. This will help you visualize what the final lip drawing will look like. And if you don’t like the general shape you’ve just made, go back to your grid and make some adjustments!

The final step in drawing lips is to curve the straight lines to make them look more realistic. In the example above, there’s a pronounced peak on the top lip, so the curve would naturally be concave to reach the sides of the mouth. To achieve the look of a fuller, pouty upper lip, the curve would be convex. It depends on the shape of the mouth as to which direction a curve should go, but if you’re having trouble deciding how to curve the upper lip of your drawing, look at reference images or try it out one way on your paper, and if it looks weird, then try it in the opposite direction. Trial and error is the best way to learn and get exactly what you’re looking for!

The next step after drawing is, of course, coloring! For each of the lip examples above, the artist has chosen 3 colors to use, and for each lip, they will use a different color group altogether. Using different color groups is a great way to see which combinations you like best!

Now that the color groups have been identified, the next step is to start with your darkest color in the areas where you know a shadow will be. In this case, that’s underneath the top and bottom lips! Use the Super Brush nib of your Sketch or Ciao marker and flick upwards about a third of the way up on each lip. We will be layering, so if you go a little past the third mark, that’s okay.

The next color we will add is our mid-tone! This will soften the blend of the darkest color and will start to make the lips look more realistic. Repeat the same technique, flicking the Super Brush nib up another third of each lip. There shouldn’t be much white space left once you’ve completed this step!
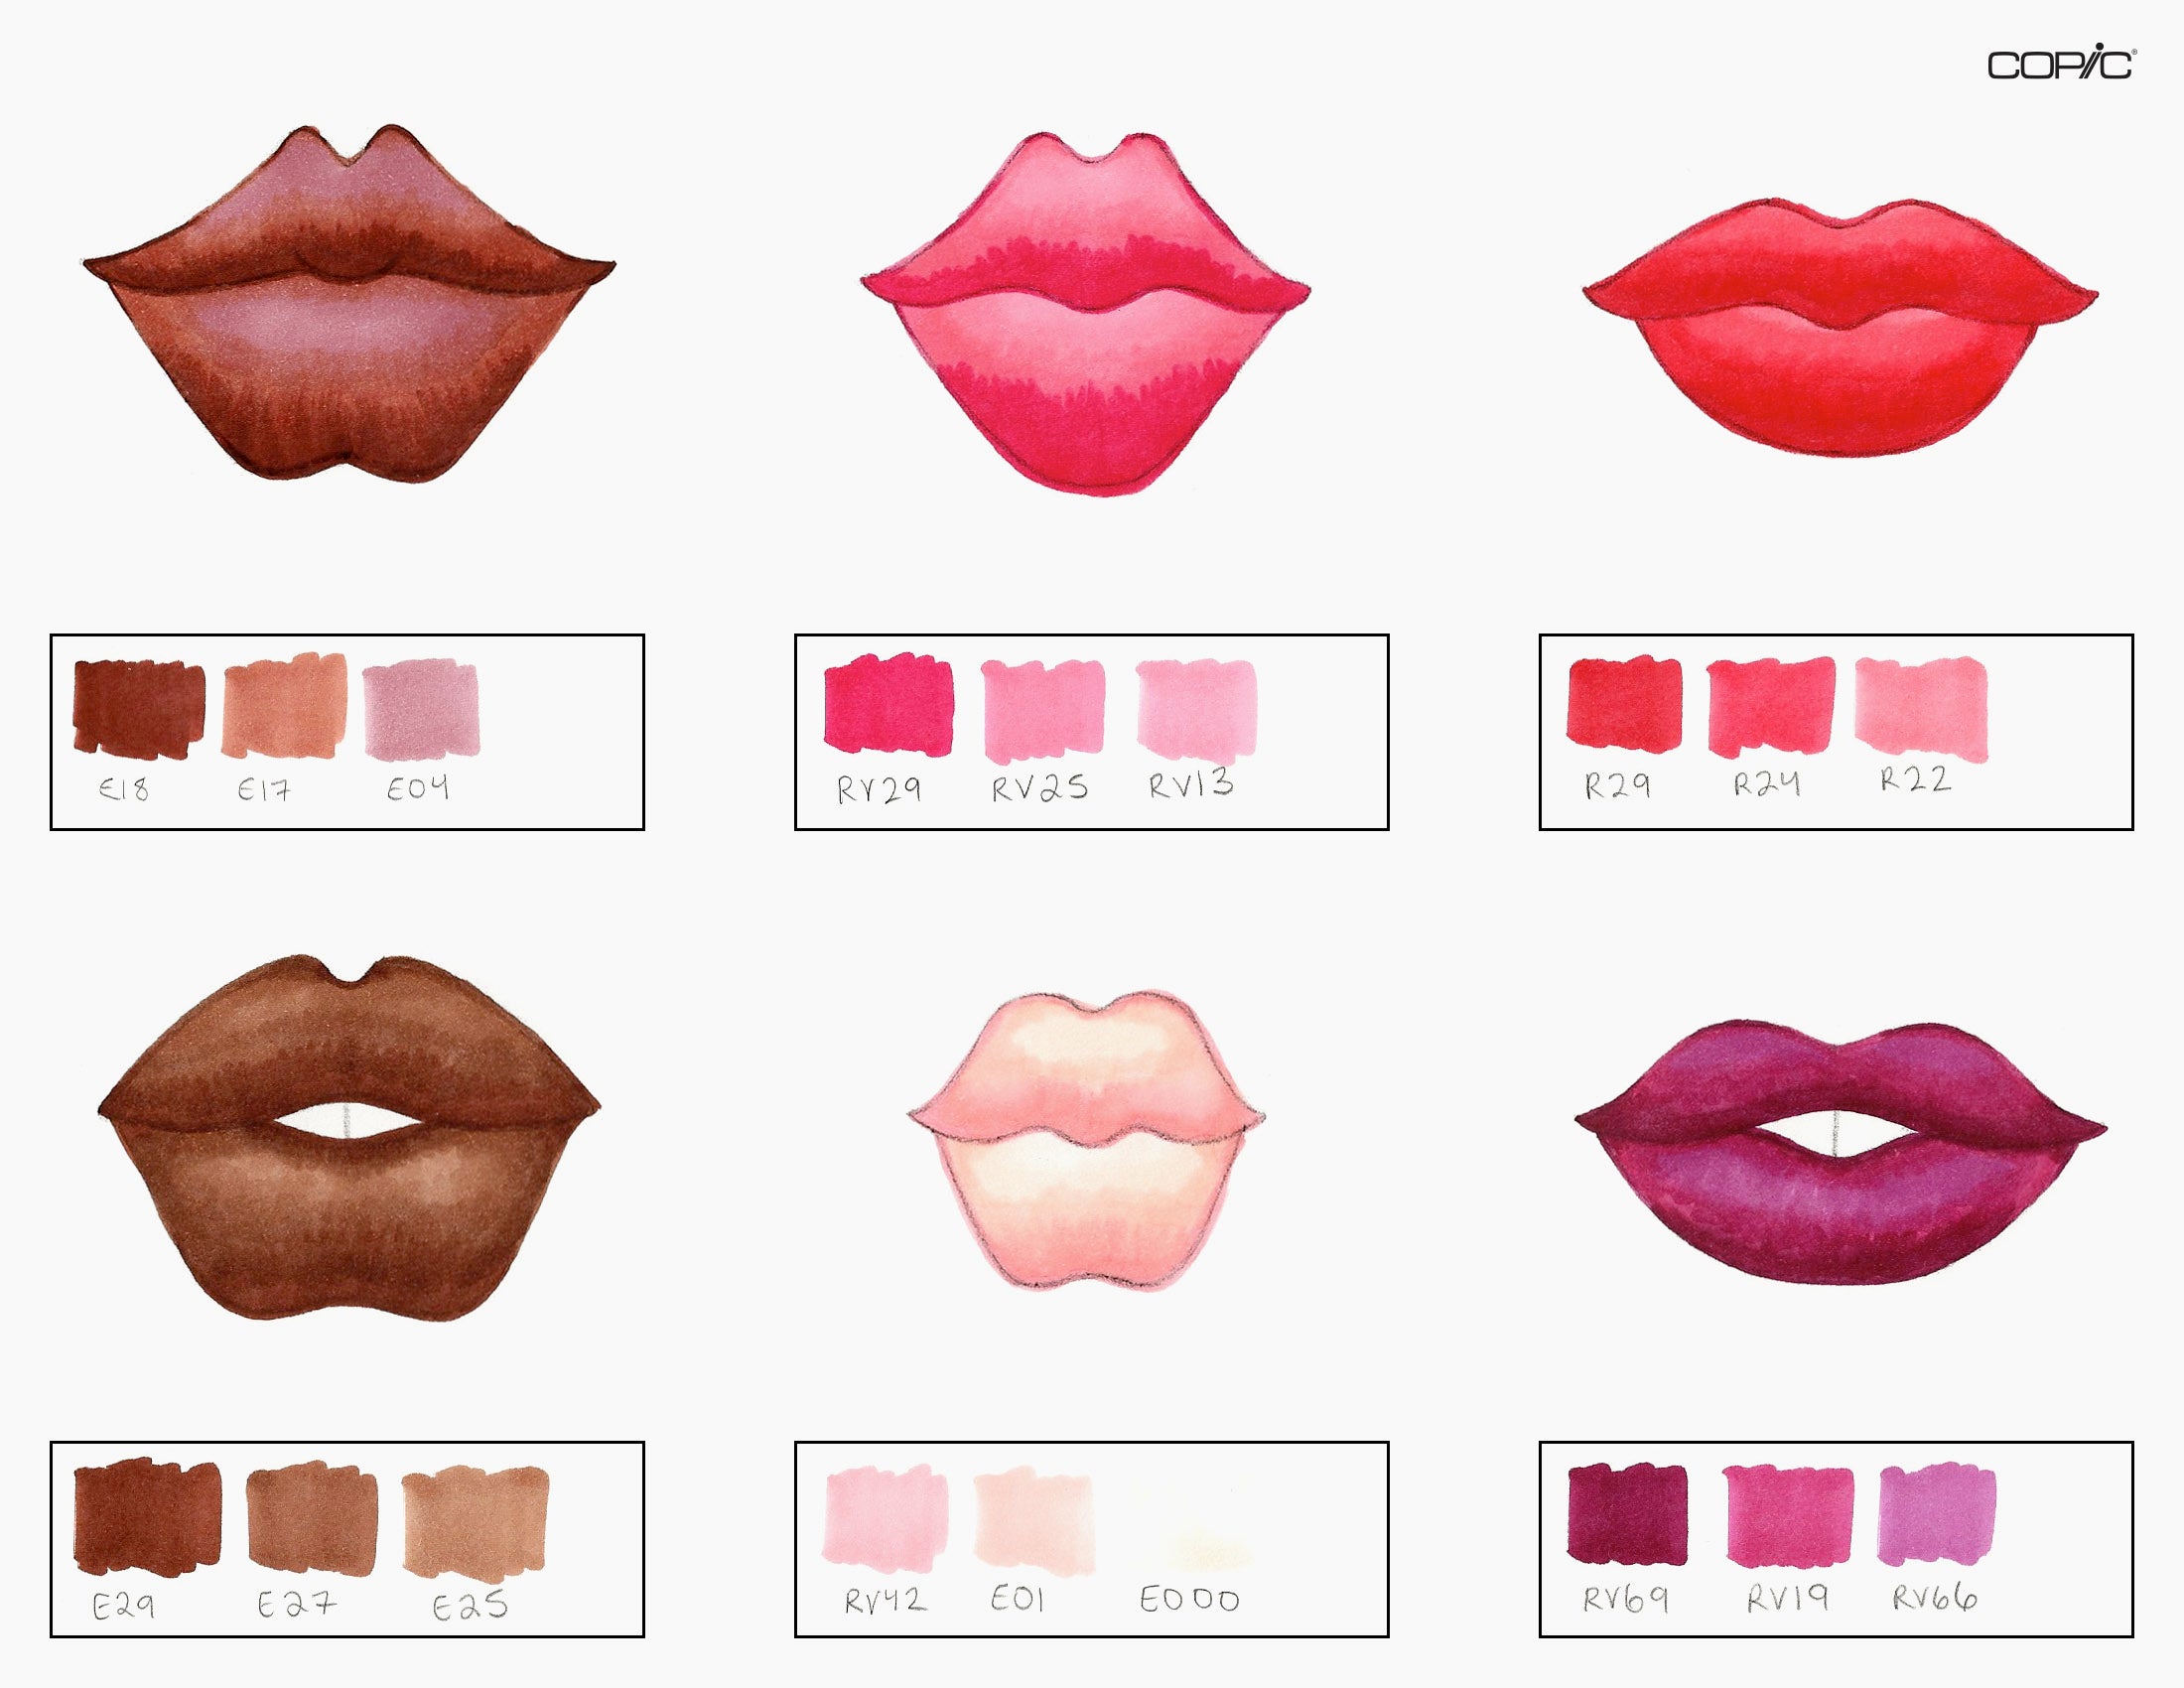
The last color we’ll add to each lip is the lightest one! This will soften the gradation between the mid-tone and create a natural highlight towards the top of each lip.

Now that we’ve completely colored each lip, the artist will go back and repeat steps 2-4 (darkest first, mid-tone second, lightest last) one more time. This will darken everything, but it will also result in more contrast. Once you’ve completed this, you’ve made some pretty stellar lips! However, if you want to take your lip game one step further…

Add some colored pencils on top to get even more highlights and create more contrast! By combining Copic markers with colored pencils (or ink, watercolors, charcoal, etc.), you add an extra level of detail to your piece that will make it stand out even more!

And with that, we wrap up this blog on how to draw and color lips! Print out the sheet above at home on marker paper or premium cardstock and practice with as many Red, Red-Violet, Earth-Tone, or even Red-Orange combinations as you’d like! Share your lips with us on social media using the hashtag #copicwithus and tag us @copic_official_us. We’d love to see your work!

In our next blog, we’ll be showing how to draw and color one last key feature to the face…hair! Until then!
Read More Articles
Writing with Acrea, Pangrams
Greetings Copic readers! In our previous blog, we continued our introduction of writing with the new acrea marker by practicing our curs...

Writing with Acrea, Cursive Letters
Hello Copic readers! In our previous blog, we introduced writing with the new acrea marker by practicing our manuscript letterform...

Writing with Acrea, Manuscript Letters
Greetings Copic readers! In our previous blog, we compared the properties of Copic alcohol markers (Sketch, Ciao and Classic) with Copic...

Using Acrea and Copic Markers Together
Greetings Copic readers! In our previous blog, we compared the properties of Copic alcohol markers (Sketch, Ciao and Classic) with Copic...