Nature, Coloring Flowers pt. 2
30-08-2022
Nature Series: How to color…
Today’s Feature: Flowers part 2!

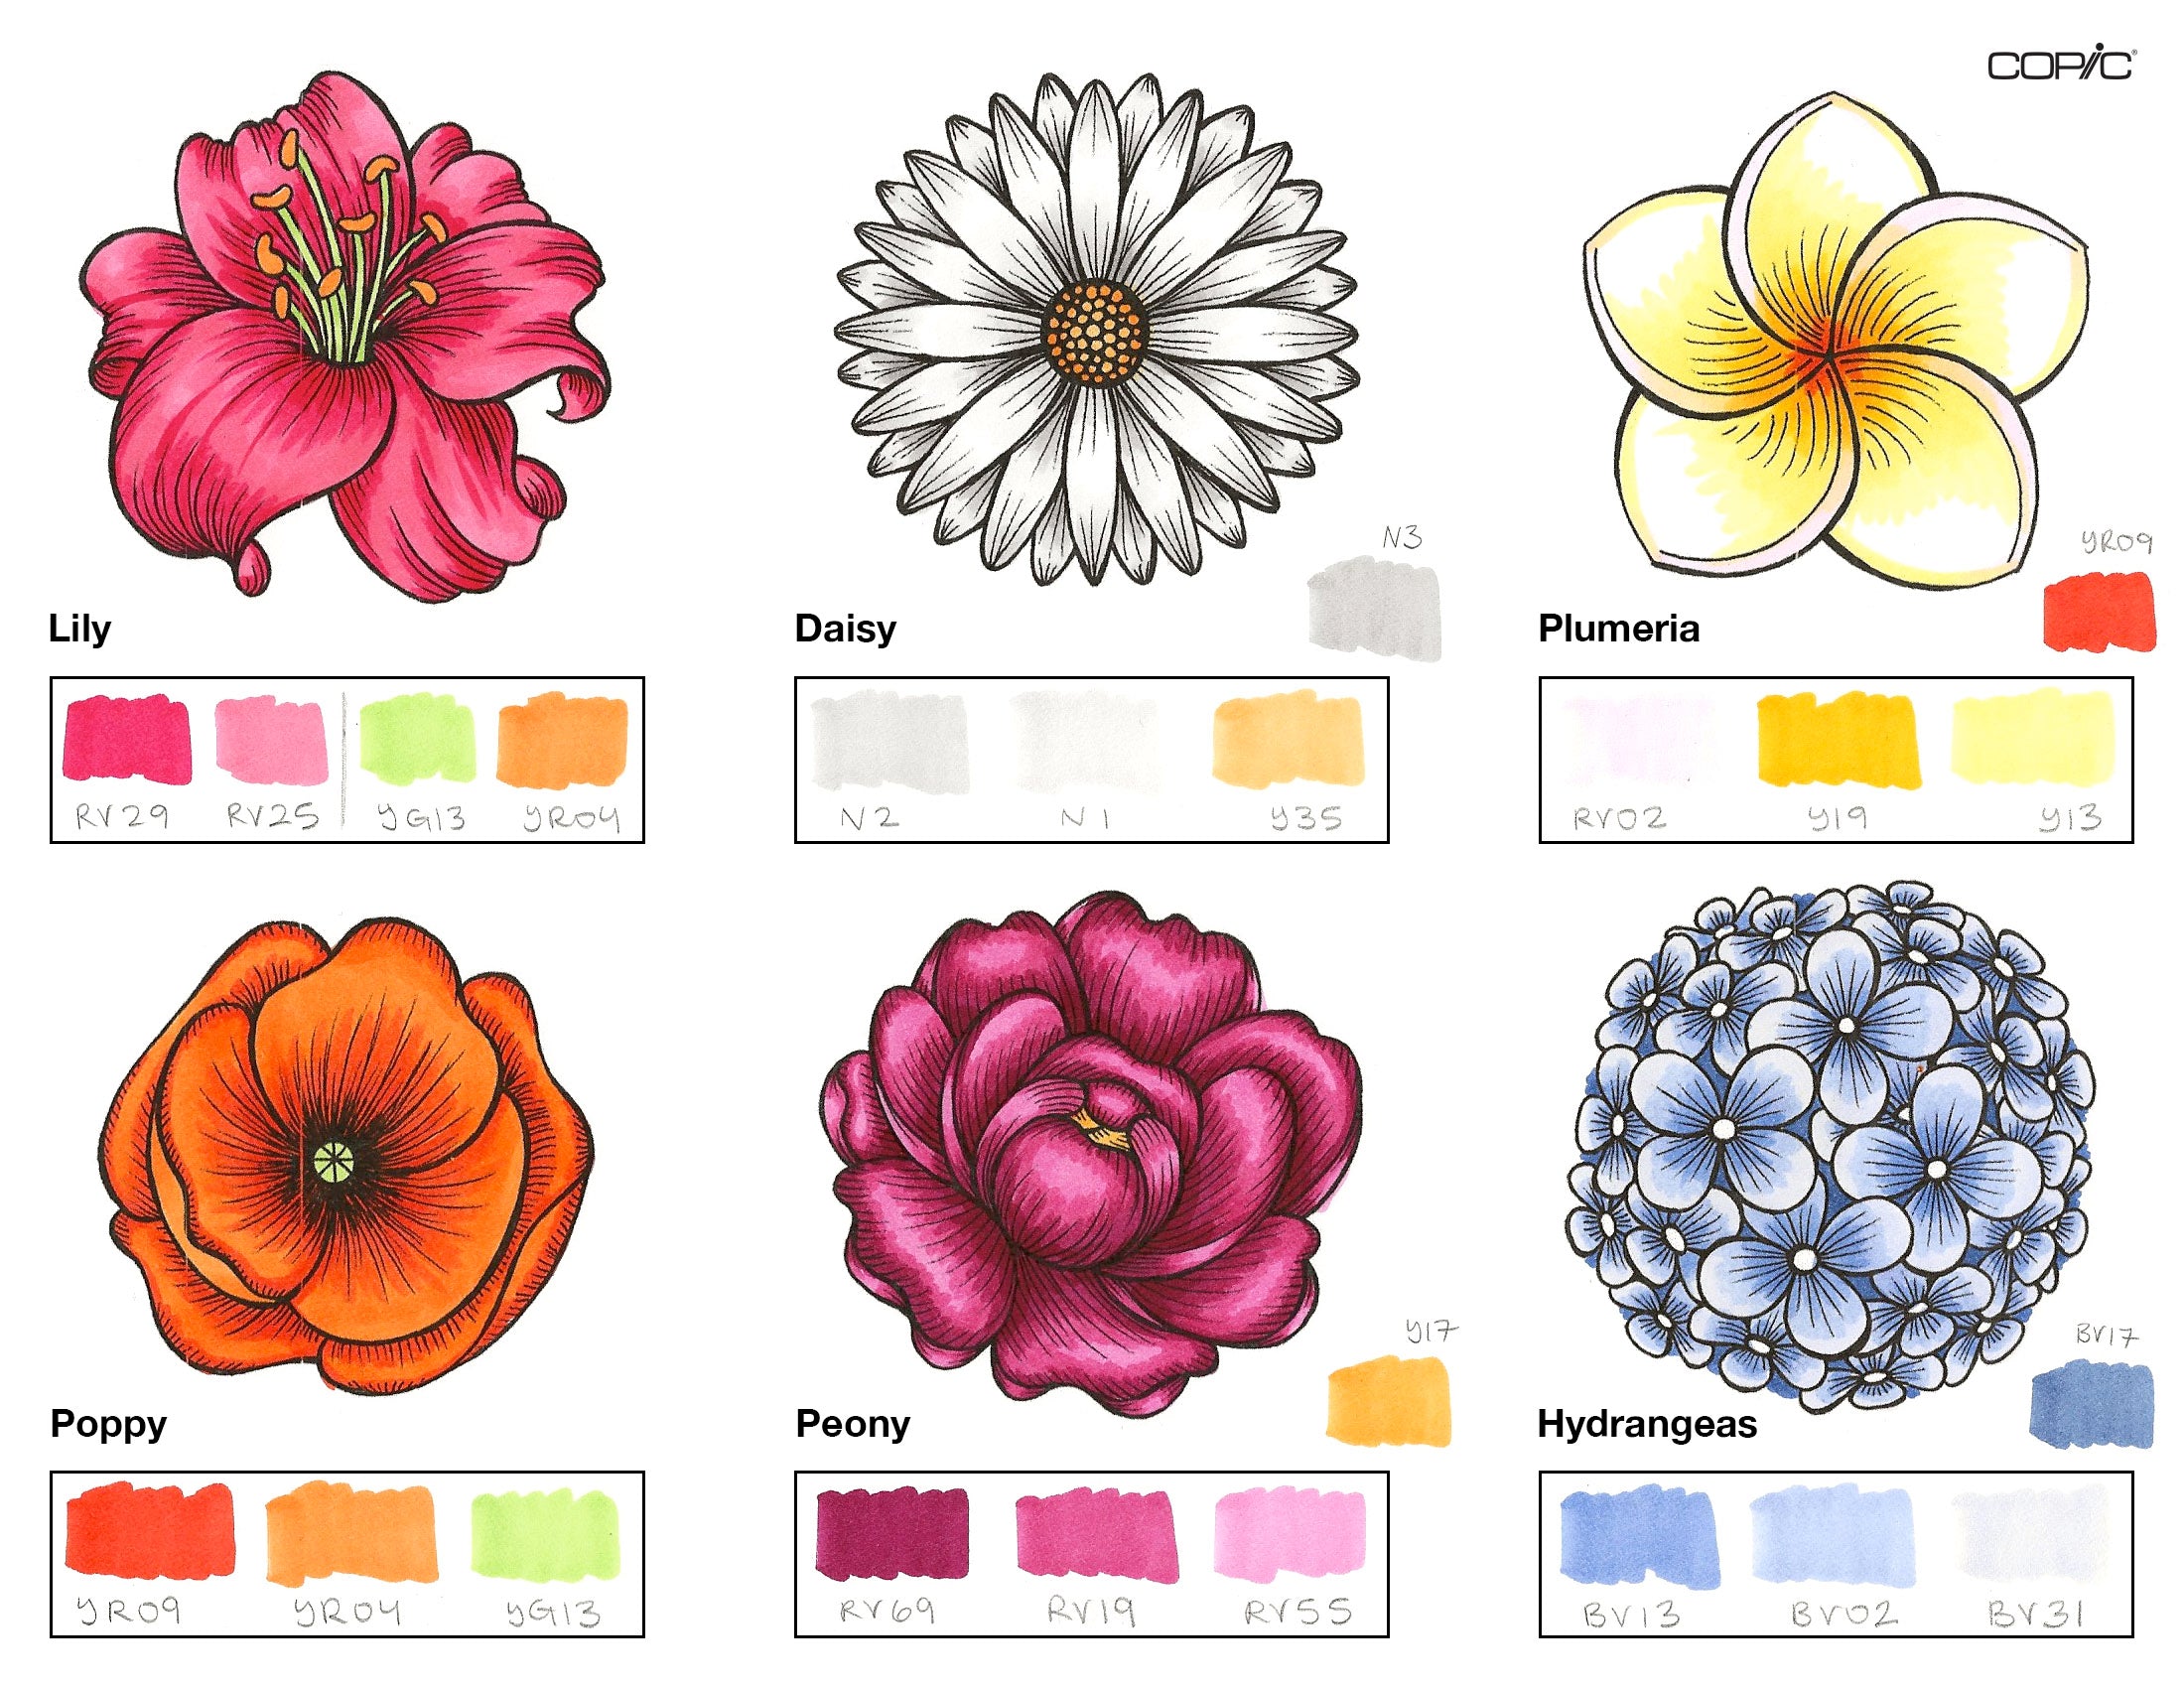
In our last blog, we showed how to color 6 different flowers using Copic markers: a Rose, Marigold, Tulip, Pansy, Sunflower, and Dahlia. Today, we’ll be showing how to color 6 more flowers: a Lily, Daisy, Plumeria, Poppy, Peony, and Hydrangeas. Without further ado, let’s get started with the first step below: choosing your color palettes!

The first thing you want to do before coloring your subject is figuring out the right palette! Test your colors on a separate sheet of marker paper before finalizing each group. Then, when you feel confident with the colors you’ve chosen, swatch them inside the rectangles on the template to prepare for coloring each flower!

Once the swatching step is complete, we’ll begin coloring each flower, starting with the darkest color first (with the exception of the Lily, where I’ve colored the delicate inside area first so I don’t accidentally color an area with dark red-violet that was supposed to be green). Beginning with the darkest color first allows for you to “set up” how the rest of each flower will look. Plus, due to the nature of alcohol-based markers, you can more easily blend a darker color with a lighter one rather than a lighter one with a darker color added afterwards.

For the next step, let’s add the mid-tone color! To make a smooth transition from your darkest color to the mid-tone, we recommend overlapping the mid-tone with the darker color/layering directly on top of it. This technique is easiest to see in the Poppy, where I’ve overlapped YR09 with YG04, picking up a little bit of the darker pigment as I fill in the rest of each petal. With the exception of the Poppy, be sure to leave a little bit of space for the lightest color coming up next!

Lastly, add in your lightest color to fill in the rest of each petal (each of the little Hydrangeas haven’t been completely filled in yet, but we’ll get there in the next step). Follow the same blending technique as we just mentioned above, overlapping your lightest color with the mid-tone so they can blend more evenly together.
*Due to the simpler color palette of the Poppy flower, all I did between the last step and this one was add another layer of YR09 and Y04 to create richer colors and smoother blends. This will be applied to all the flowers in the image below.
The final step is to add another layer of every color to create more contrast! It’s also the time to make adjustments or add another color if you want, like the dark yellow in the center of the Peony, N3 for adding deeper shadows on the Daisy’s back petals, and BV17 for the inside area of the Hydrangea bulb. However, if you want to add even more details, we recommend using colored pencils on top of your Copic markers to create an even more realistic look!

Apply the lessons learned in today’s blog and practice on the template above, found in our line art gallery! Be sure to download and print this template on good quality paper, as the paper you color on makes a huge difference in how well your final piece turns out!

If you don’t want the distinctive black-outlined look for each of these flowers, we have a light gray template option for you to download and print instead! Following the same steps as written throughout this blog, using this light gray template will result in a realistic looking flower. The light gray template is similar to a pencil sketch, whereas the black template is similar to outlining your drawing with a pen.

The image above is an example of what each of these flowers can look like with the light gray template. Softer, more realistic-looking flowers! *No colored pencils were added…this was entirely done with Copic markers!
_
Stay tuned for our next blog, where we’ll be continuing our Nature series with our next topic: leaves! We’ll be showing you how to draw and outline different leaf shapes with Copic Muliliner pens!
Read More Articles
Writing with Acrea, Cursive Letters
Hello Copic readers! In our previous blog, we introduced writing with the new acrea marker by practicing our manuscript letterform...

Writing with Acrea, Manuscript Letters
Greetings Copic readers! In our previous blog, we compared the properties of Copic alcohol markers (Sketch, Ciao and Classic) with Copic...

Using Acrea and Copic Markers Together
Greetings Copic readers! In our previous blog, we compared the properties of Copic alcohol markers (Sketch, Ciao and Classic) with Copic...

Copic Sketch vs Acrea
Hello Copic readers! In our previous blog, we showed how to color with the new acrea paint markers on dark, non-white backgrounds. Today...