TREES, drawing a forest
31-01-2023
Nature Series: How to draw stylized, folk-art inspired trees
Today’s Feature: Illustrative FOREST!

Hello readers! In today’s blog, we will be continuing with the same subject from our last blog (stylized, folk-art inspired trees and shrubbery), but we’ll take it one step further! Today, we will use all of the tree and bush shapes to create our very own illustrated forest! I’ll be showing y’all how to plan an eye-catching composition, how to draw the plants, and finally how to outline them with your Copic Multiliner pens. And with that, let’s grab our materials and get started! 🥳

The first step in drawing a composition is to loosely draw all of your shapes, as seen above. I also like to call this the “mapping process,” because you quite literally map out your compositional plan! Notice how I overlapped the shapes as well. I did this so that I could take a step back once I added all the shapes I wanted, and then erase the lines according to which order I want the shapes to lay in (i.e., what will be in the foreground, middle, and background). This early stage is all about mapping and planning, so press lightly and don’t be afraid of your eraser!
*Tip: In the previous blog, I talked about using common shapes for the forest, like circles, domes, triangles, etc. By choosing from that variety, my composition has balance; where there are more complex shapes, there are simple shapes around it, and vice versa. This allows your composition to breathe and not come across as too simple or too busy!
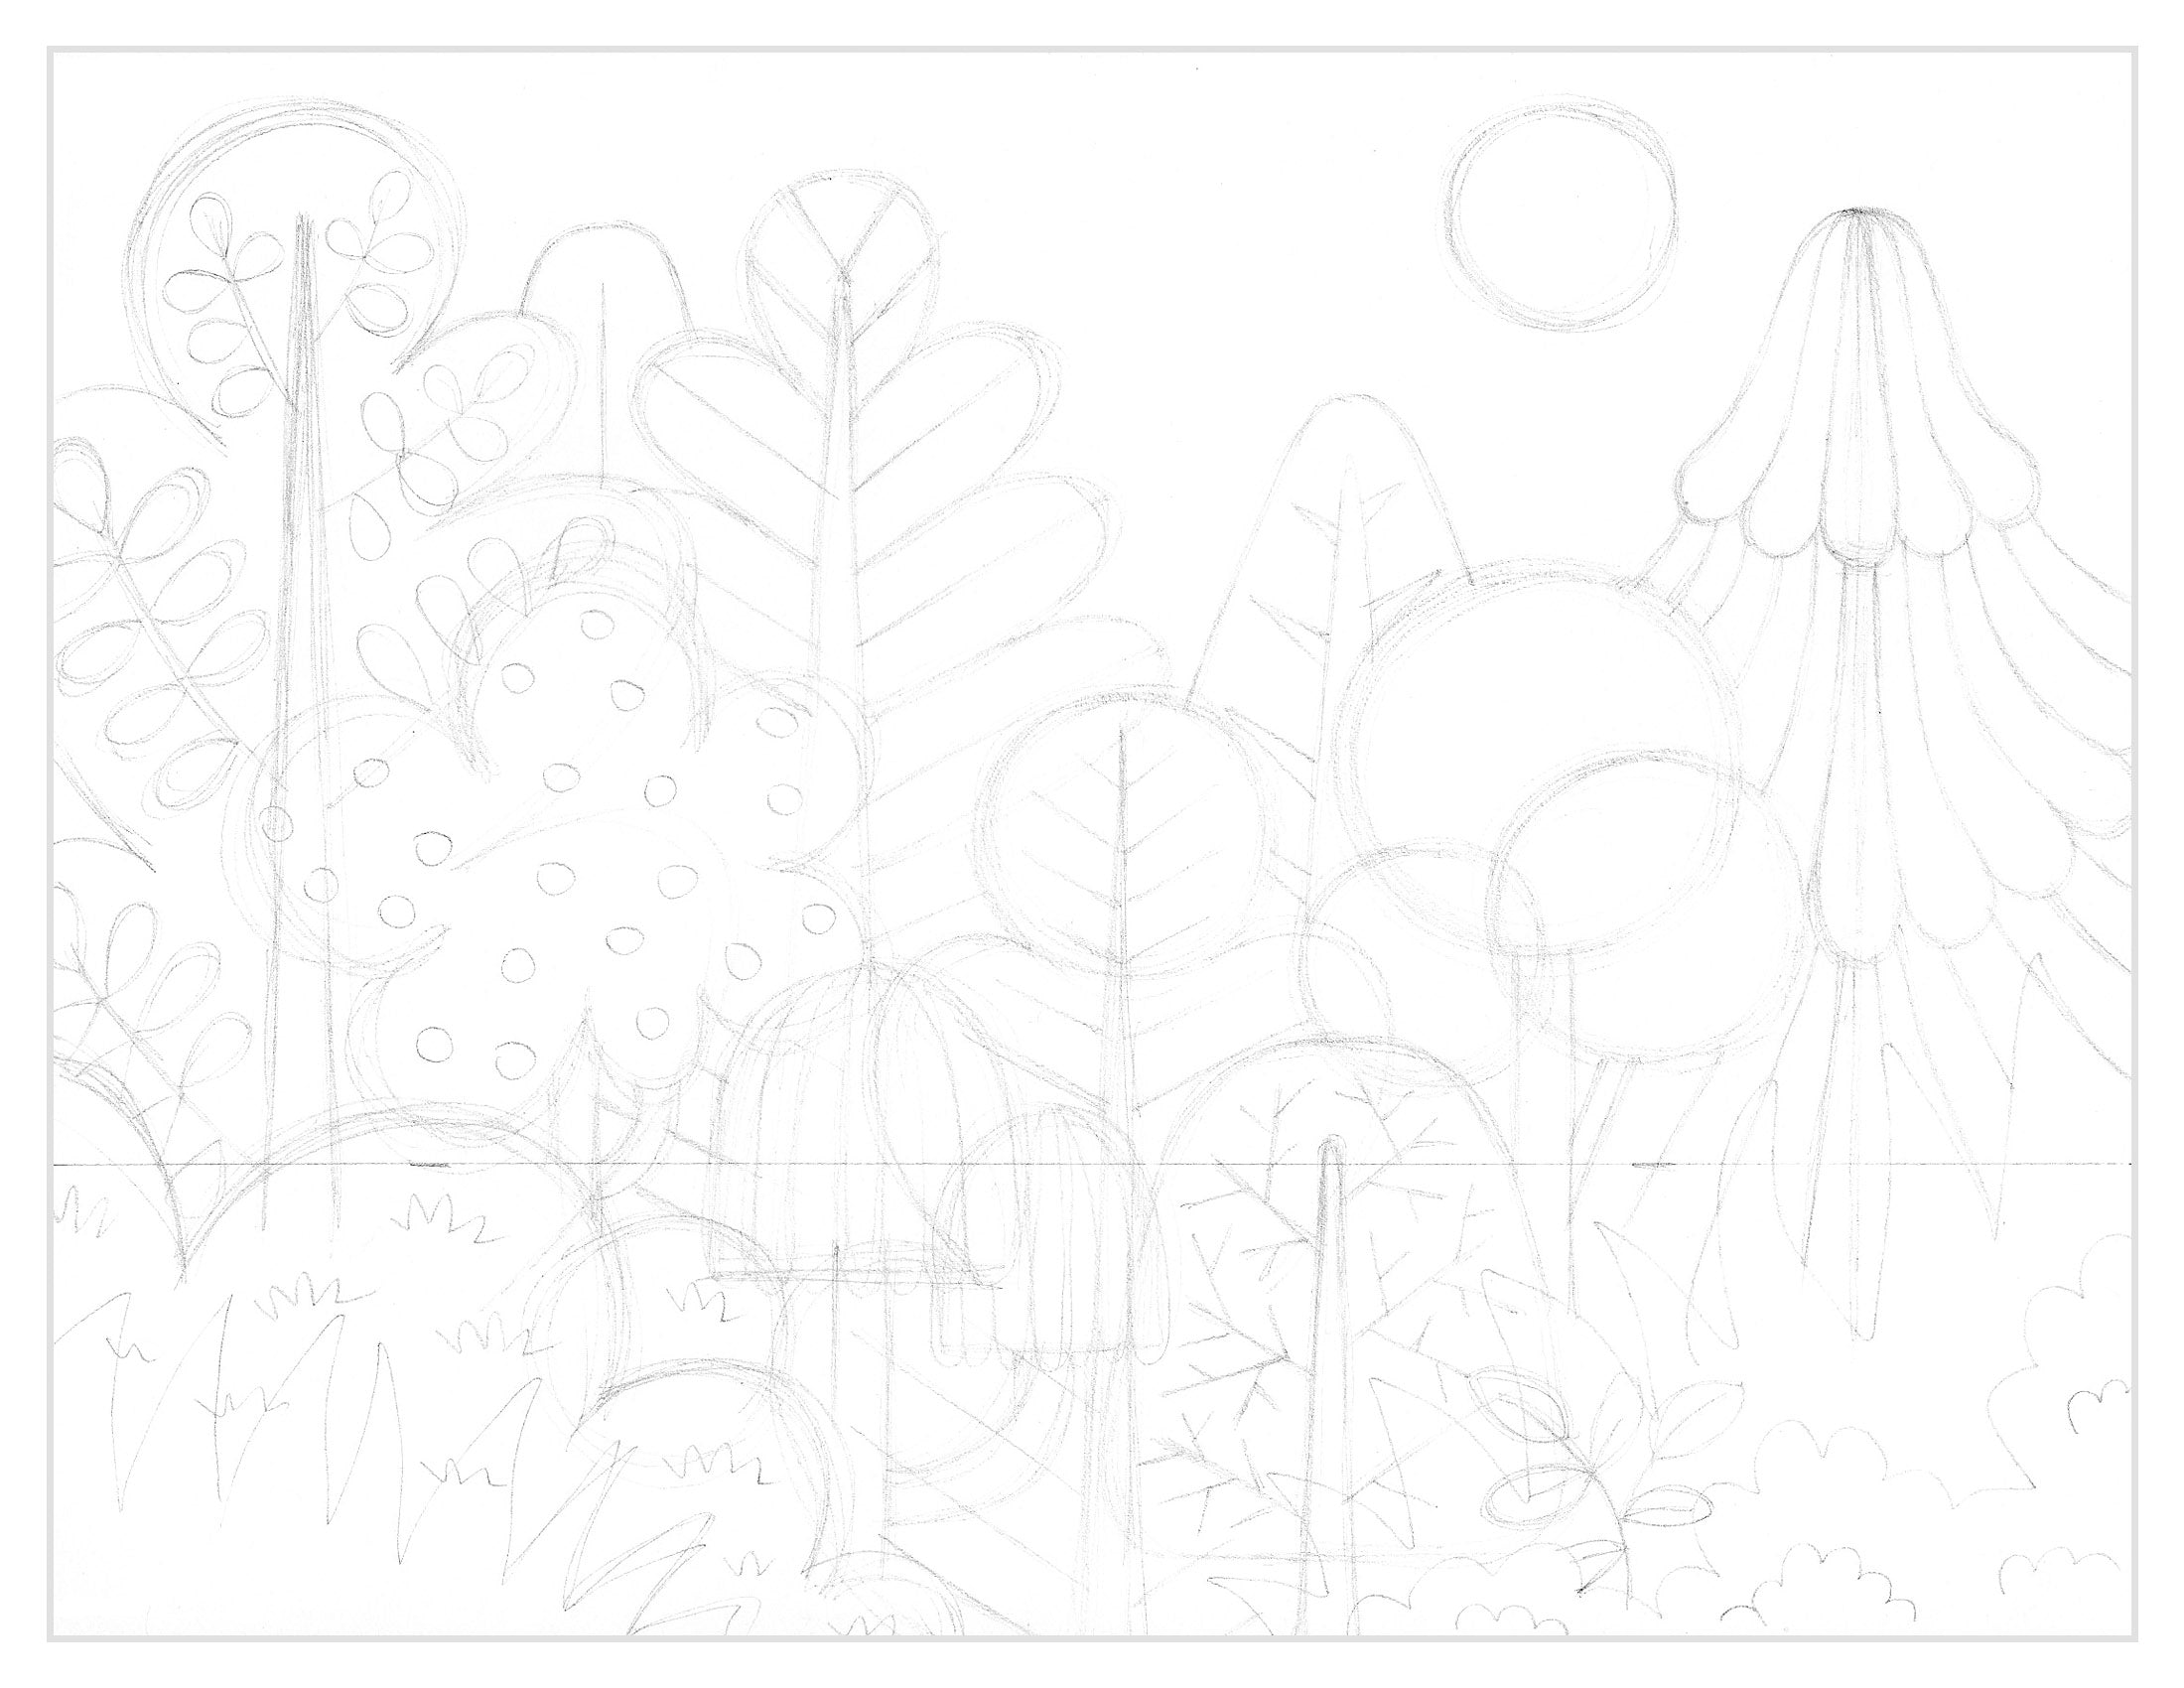
The second step in drawing a composition is to refine your shapes and add details once those shapes have been refined. Above, I have made all of my tree and shrub shapes more defined by outlining them a little harder with my pencil, and then I added little details inside a few of them. Some of these details include small circles, lines, and/or squiggles. The details you add are up to you! But we suggest not repeating them for this piece, since this is a relatively small work of art and we wouldn’t want the composition to get too repetitive or boring!

The third step is my favorite one: outline everything with your Copic Multiliner pen! I chose to use a Black 0.5 nib for outlining this piece, and since the paper is 8.5 x 11 inches, I recommend using a 0.3 nib and above.
As you’re outlining, do your best to complete each line in a single-pass/without lifting your hand up. This will produce a smooth, even line! However, you can see that some of my lines above are a little thicker than others, and even after many years of drawing, I can still struggle with making a straight line all the time. So don’t get discouraged if you need to go over your lines again to smooth them out! That’s exactly what I did in the fourth and final step below.

As mentioned above, the final step is to go over your big, major shapes one more time with a thicker Multiliner pen! Since I outlined everything the first time with a 0.5 width nib, I used a 0.8 nib to “bulk up” the major shapes. This does two things: it smooths any imperfections in my initial lines, and creates line variation and contrast within the composition. The end-result is that the details inside each part of the forest now look more delicate, and the composition as a whole looks more complete! 🤗

Want to practice outlining this finished forest illustration? Print the template out here on an 8.5 x 11 sheet of cardstock paper at home and practice! Be sure not to press too hard on the paper as you apply the pen to the page, and pivot the paper if you have difficulty turning your wrist to meet any sharp curves!
And, if you do need to lift your hand up, try getting to a point in the shape where an edge meets so it won’t create a noticeable, heavier dot of ink (this commonly happens when you pause before lifting the pen off the page; ink continues to flow out of the pen but you’re not gliding it across the paper, so it sits in one spot and expands).

That's a wrap on today’s blog! Please share your creations with us on social media using the hashtag #CopicWithUs, or tag us @CopicOfficialUS on any social media platforms.
Stay tuned for our next blog, where we’ll continue on the topic of an illustrated forest by showing you how to create a color palette in preparation for coloring! Until next time! 😊
Read More Articles
Writing with Acrea, Manuscript Letters
Greetings Copic readers! In our previous blog, we compared the properties of Copic alcohol markers (Sketch, Ciao and Classic) with Copic...

Using Acrea and Copic Markers Together
Greetings Copic readers! In our previous blog, we compared the properties of Copic alcohol markers (Sketch, Ciao and Classic) with Copic...

Copic Sketch vs Acrea
Hello Copic readers! In our previous blog, we showed how to color with the new acrea paint markers on dark, non-white backgrounds. Today...

Copic acrea on Colored Backgrounds
Hello Copic readers! In our previous blog, we showed how to color with the new acrea markers using each of the four 6 pc sets. Today, we...